Farm Guide
Building Meaningful Biodiversity Data
You’re ready to get started with HiveTracks Bio.
Here’s everything you need to set up your account and site from scratch. It only takes a few minutes.Watch the video, or follow the step-by-step instructions.
Step 1 — Create your account
Click the link HERE to get started.
Or, if you've been invited to join HiveTracks by someone else, click the invite link and create your own login details and account.
Sign up with your chosen email and password. Once you're in, your organisation is automatically created for you. You can edit the Organisation Name and invite members of your team to be either admin or standard members from the drop-down edit functions. You will need to copy the generated invitation link and send it to the person via email or a messenger service.
Step 2 — Create your farm
From your dashboard, you'll see an option to create new sites. Make sure you select "New Farm" — not "New Site." This is important as it uses the correct setup flow for farm-based monitoring.
New Site gives you the option to define a site boundary and draw segments to monitor. This option is usually used for smaller sites where higher levels of detail and data collection are required. If you would like to use this option and draw segments, just follow the prompts on each screen to complete the site setup. For a personal or farm site, it is recommended to choose your own monitoring locations when asked whether to have one generated by us or use your own.
You'll be asked to:-
Give your farm a name
-
Set its location (search by address or GPS coordinates)
Step 3 — Drop your monitoring pins
Next, you'll see a map centered on your farm. This is when you place your monitoring pins — one for each location you want to survey. They do not have to be placed in a specific location; they are simply used to mark an area you wish to monitor. You will choose specific monitoring locations on the next screen.
For each pin:-
Give it a name
-
Choose a habitat type (e.g. hedgerow, field margin)
-
Pick a colour
When you're happy with your pins, click "Create Farm."
Step 4 — Set up your sampling strategy
After creating your farm, you'll land on the sampling strategy page. HiveTracks automatically generates a transect (used for monitoring pollinators) and a quadrat (used for monitoring plants) based on your pins — but this is your chance to fine-tune them.
Drag and drop the auto-generated records to exactly where you want them on the map. You can also add any additional ones you need at this stage from the icons on the side of the map.
Once you're happy with everything's location, you're all set and ready to start collecting data. Simply log in to HiveTracks Bio from your web browser on your phone, and you'll see your site.
For troubleshooting, see article: Setting up a Farm Site Guide in Zendesk.

-
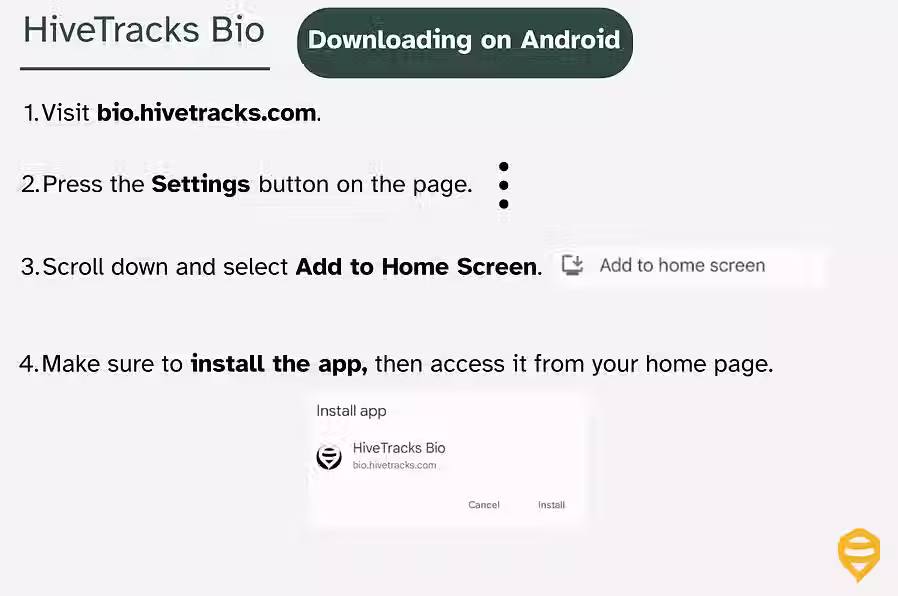
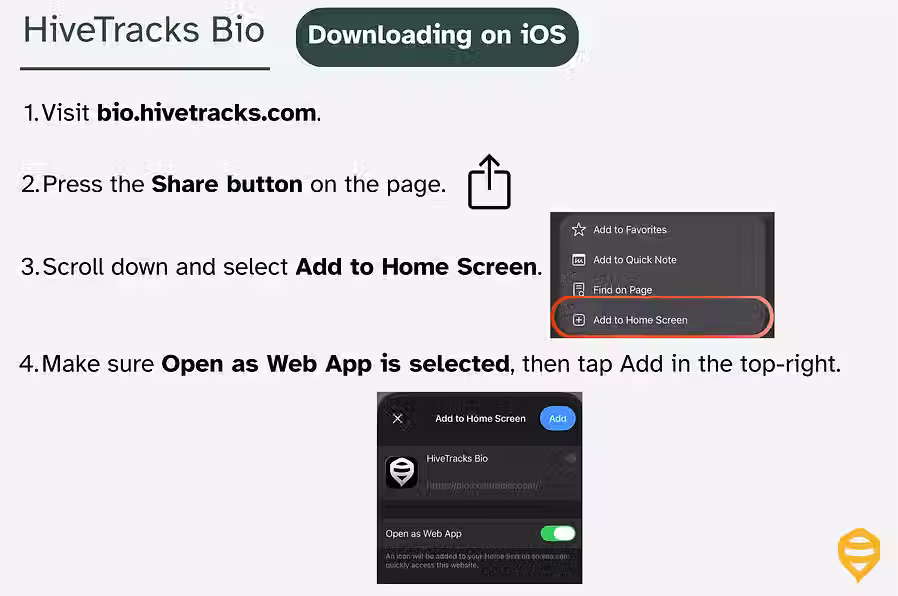
You can install the page as a web app or home screen icon. Instructions on how to do this are in the support materials below, but:
-
For iOS, select the browser setting, click the share icon, and select Install or Add Home Screen Icon from the list.
-
For Android, select the browser settings and click download or install home screen icon from the list of options.
-
Log into the HiveTracks Bio App using the email address associated with the account.
Navigate the site to reach your first quadrat or transect.

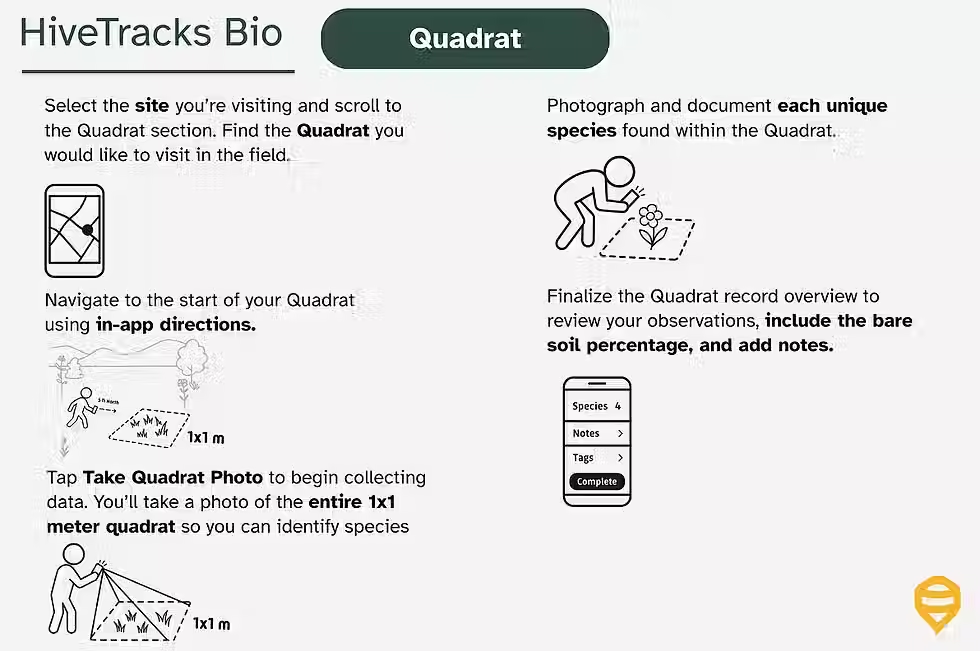
A quadrat is a 1m × 1m plant survey used to record vegetation within a defined square area. In HiveTracks Bio, quadrats appear as gray dots on the site map.
.avif)
A transect is a structured survey conducted along a defined path to record plant and pollinator activity.
A Transect should be 10m and has defined start and end locations on the site map
Transects must only be completed during flyable hours:
-
60–100°F (15–39°C)
-
Winds below 15 MPH (24 km/h)
-
No precipitation

-
Observations are not necessary for a monitoring plan. Rather, it is a tool to capture individual species seen on the site.

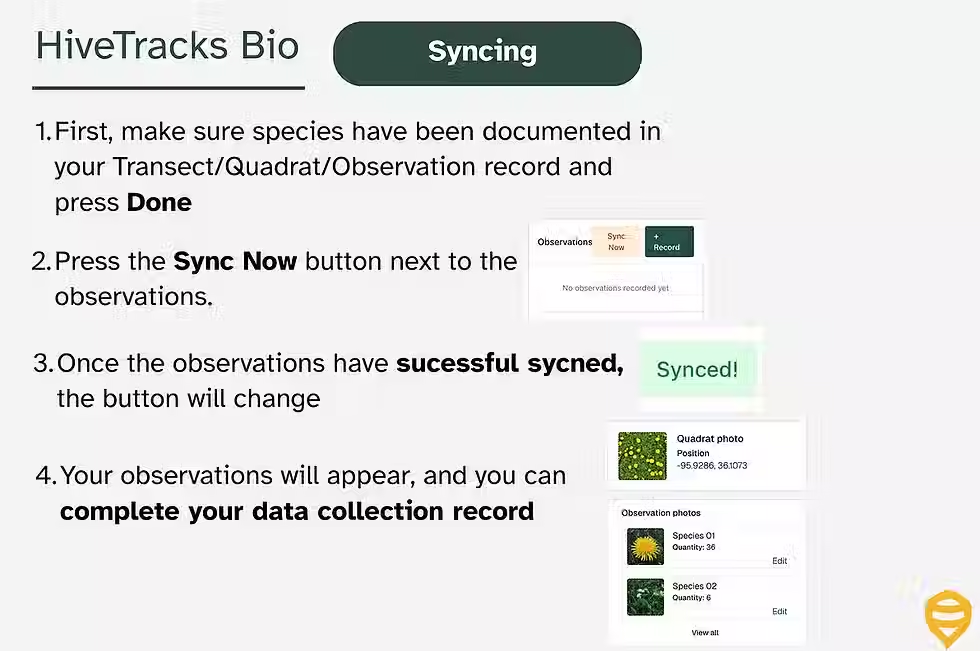
Sync your data after completing the data collection process for Quadrats/Transects/Observations to ensure all records are uploaded correctly.
Do not leave site until syncing is complete and confirmed.
eDNA testing is an optional add-on. If your program already includes eDNA sampling, follow the instructions below. If you would like to include eDNA testing, please contact HiveTracks.
Most sites will have 1-3 eDNA tests per year. Instructions below should you need to perform an EDNA test,
Honey - Test honey for floral presence
Flowers - Pick flowers to identify pollinator visits
